
Very often, our clients ask us to change item dimensions in Dynamics 365 Business Central.
Users who work regularly with the interface frequently find the need to adjust the width and height of item dimensions in Business Central. That’s why we decided to create this guide to help them through the process.

In this article, we will explore how to modify the dimensions of elements within a page in Business Central (BC).
Specifically, we will focus on adjusting the size of elements to make the most of the available space in the window.
I want to show how this can be done through code, as it may be useful—especially for those who are new to Dynamics 365 Business Central.
The Issue with Element Dimensions in Dynamics 365 Business Central
When we try to place two parts on the same page, side by side, and have them occupy as much space as possible, we quickly discover that Dynamics 365 Business Central automatically determines both the width and height of these parts.
In the following image, we can see the problem:

As you can see, all that white space is not being used. In fact, there are still records on the left side, and the system has even created a scroll bar, meaning we could display more records — but it doesn’t show them.
The goal is to have the list on the left take up as much space as the window allows.
Now that we’ve explained the issue, let’s look at the solution.
Solution: Modifying Layout Through JavaScript
Step 1: Creating the Objects
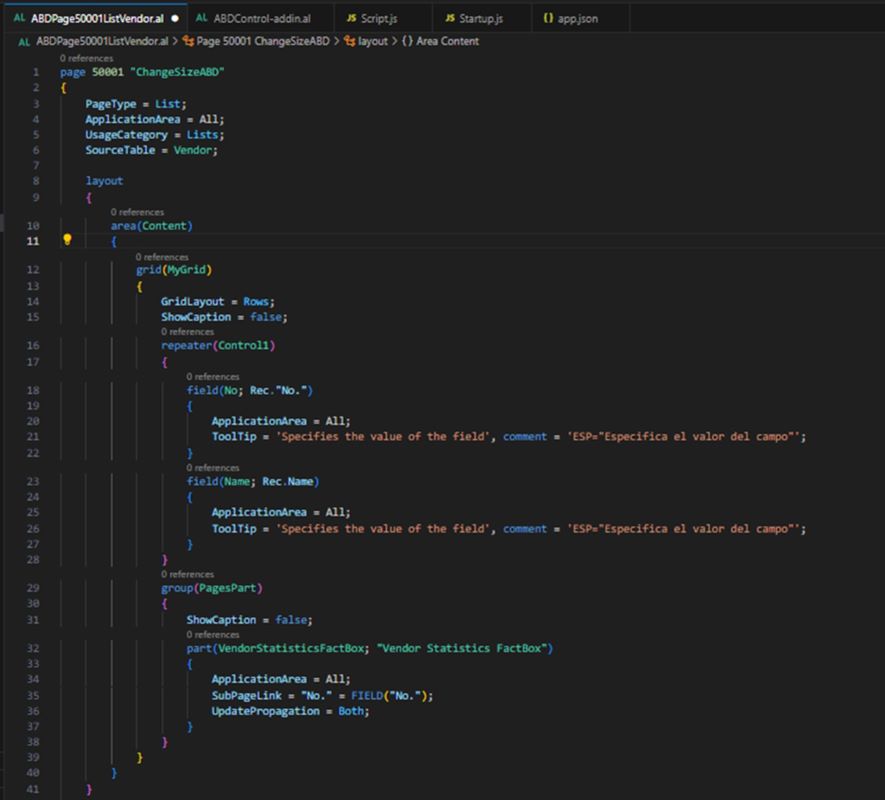
The first step is create the objects that will display the data. For this example, I created a vendor page that shows the vendor list along with a factbox containing vendor statistics.
Step 2: Modifying the Layout Through JavaScript
The solution now involves adjusting the height and/or width of these elements using JavaScript.
As we usually do for this type of customization, we will create a ControlAddin:

This ControlAddIn will contain two JavaScript files: one for the startup event and another with the function that will apply the size changes to our element.
Essentially, what we request in this function is to receive the element exactly as it appears in HTML. We will see shortly how to obtain it.
After that, we add some margin from the bottom and right edges of the screen, both for height and width.
The final three boolean parameters determine whether all elements with the same name should be modified or only the first one, and whether the height, the width, or both should be adjusted.
Now let’s create the "Scripts.js" file and add the global variables along with the function and its input parameters:

Here we initialize the global variables and call the resize function.
The resize function is very simple: if we choose to modify all elements, we will need to loop through the entire array of elements.
If not, we will only take the first one and pass it to the final function, which handles both scenarios and is responsible for changing the height or width of the element.
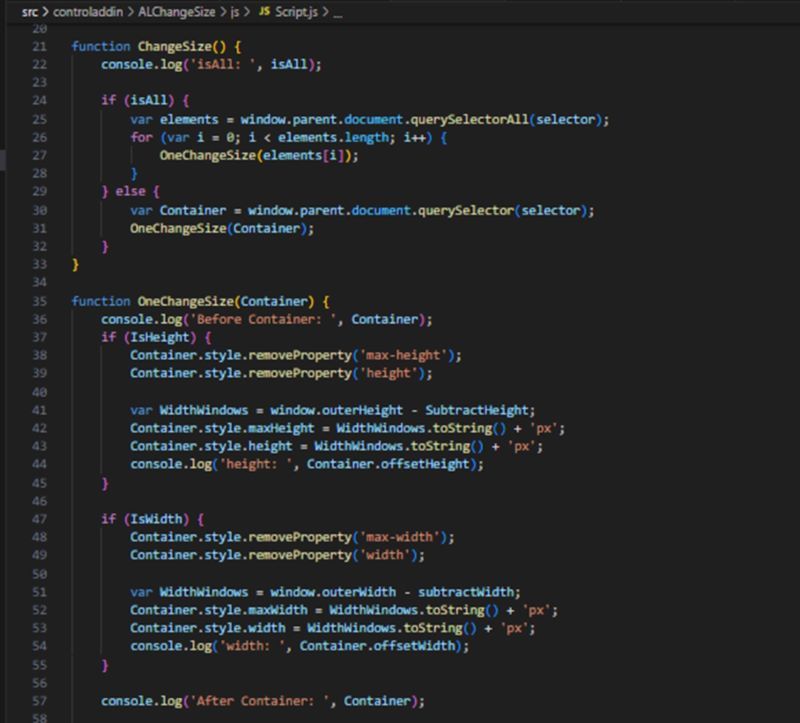
I added several console.log statements to monitor the changes directly in the browser console.
We remove the properties so that it becomes easier to add them again later if needed.
Finally, in this file, we attach a handler to the window resize event and call the resize function again, ensuring that the element is resized dynamically without any issues.

Step 3: Linking to Events
Now it’s time to add this functionality to our page. But first, we need to determine which CSS class is assigned to the element we want to modify.
To do this, we open the page and access the browser’s developer tools:

This will open a window similar to the one shown below:

We need to go to the Elements tab and click the button to select an element on the page.
Next, we return to our Business Central page and click on the vendor list.
Only the vendor list should be visible.
When we click inside the Developer Tools window, it will highlight exactly what we selected, showing the element as Dynamics 365 Business Central renders it.

The information we need in this case is the name of the CSS class, and that’s the value we will use.
Now we go to the page and add our ControlAddin as follows:

As we can see, we add the class to the selector, and for the height we will test different values so you can observe how it changes in Business Central. Ideally, the element should not touch the edge of the window. We also specify that only the height will be modified.
Final Step: Changing Element Dimensions in Dynamics 365 Business Central
Finally, we publish our app and run the page again. We will see that our vendor list now takes up the full available width and height of the window.

You can add as many as needed.
I hope you find it helpful.
If you found this useful, you may also be interested in reading: How to Create a Custom API Page in Business Central
As specialists in business management software, at ABD Consulting and IT Solutions we take pride in providing effective solutions tailored to your company’s needs in Dynamics 365 Business Central and Microsoft Dynamics NAV.
Feel free to contact us for personalized guidance and to begin optimizing your company’s management processes today. We are here to help you achieve your business goals.
Dynamics Programming –